
How to create an S3 bucket, and restricted access keys
Let’s say you want to set up an Amazon S3 bucket to use it for automated backups, or as a CDN location for your webservices. You’ll want to configure it in a way so every bucket has a specific access key/secret combination. You know, just in case. Should 1 key pay be compromised, other buckets on your account are still safe.
Here’s how:
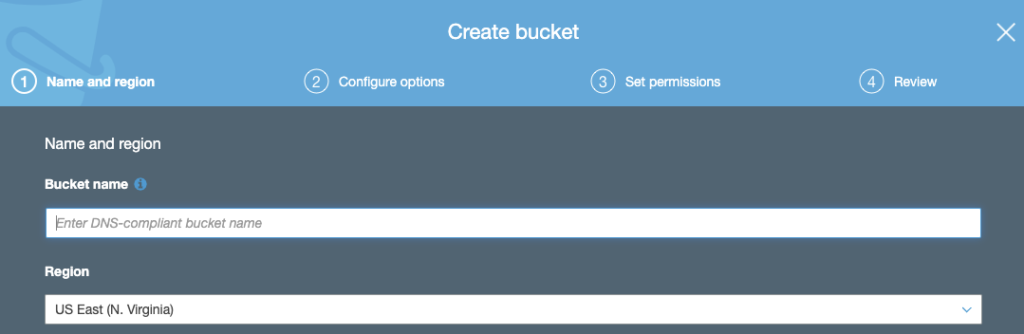
1. Create your S3 bucket
Go to https://s3.console.aws.amazon.com/s3/home and click “Create bucket”
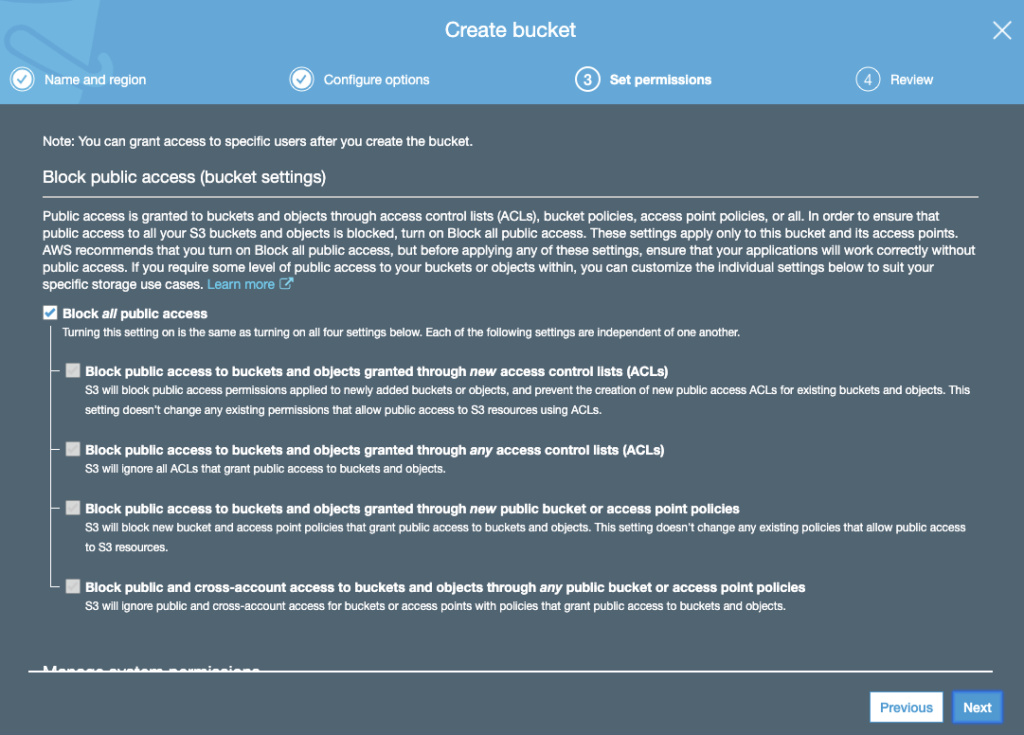
2. Configure your S3 bucket
Depending on if you want to make this a private bucket (for backups), or public bucket (for CDN’s), you’ll need to configure specific options. These are documented throughout the setup wizard by Amazon and defeat the purpose of this blog article.
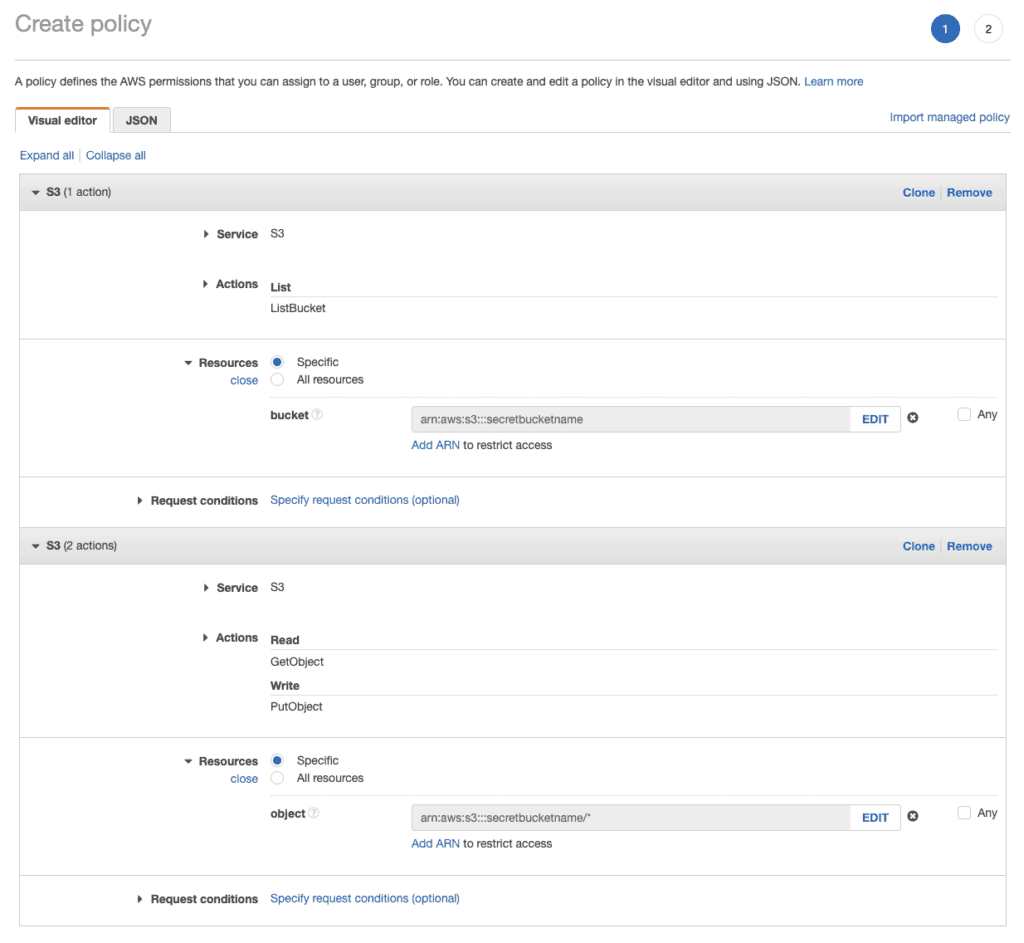
3. Create a new IAM policy
This is where things get a little bit more complicated, we want to create a custom policy so our new bucket can only be accessed by users with this policy. This way, we can create a new user per bucket, so SHOULD a key be compromised, only this particular bucket will be compromised instead of all buckets.
Go to https://console.aws.amazon.com/iam/home?region=us-east-1#/home and click Policies. Click “Create policy” to continue.
Fill in the form like this:
Review the policy, give it a name, and save it.
Note: Depending on your needs, you might want to block all public read access by default. This is an S3 bucket setting. If you want to make certain files in a private S3 bucket public, make sure to add the “PutObjectAcl” policy to your user, so your programmatic user has enough permissions to overrule this per file.
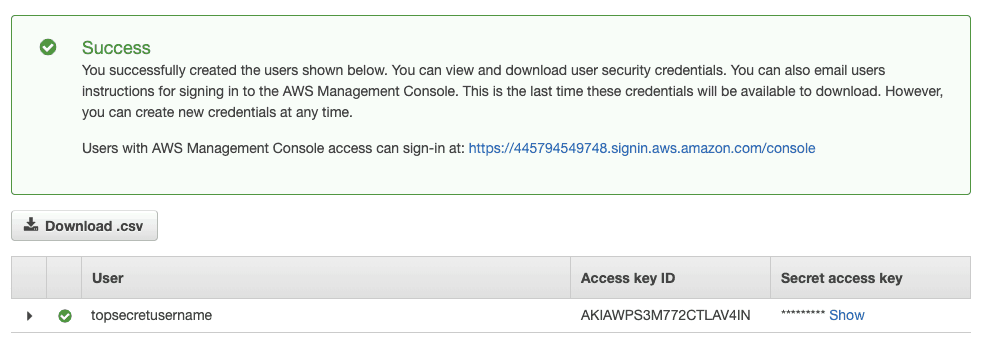
4. Create a new user
Go to https://console.aws.amazon.com/iam/home -> Users -> “Add User”.
Make sure to only select “Programmatic access”. These keys should not be used to log into the AWS console.

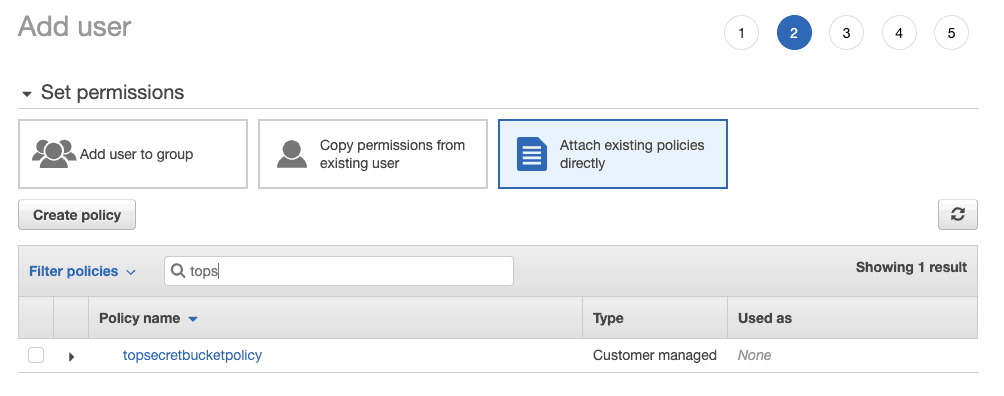
5. Attach your custom policy
In step 2 of the user creation process, find your custom policy.
After this, Amazon gives you a few more options to customize your account which could be useful in terms of billing (tags).
After that.. you’re done! You can now use this access key/secret to access your newly created bucket.
If you use Transmit (Mac), you can easily access your bucket by choose the “Amazon S3” server option:
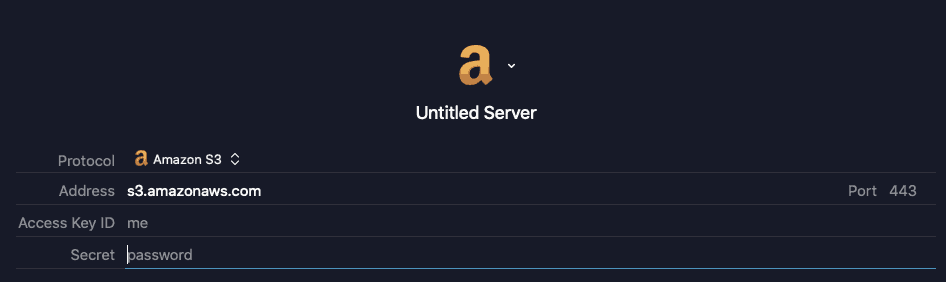
Just make sure your bucket region and bucket name match.
For example: secretbucketname.s3-us-east-1.amazonaws.com
Syntax: {bucketname}.s3-{aws-region}.amazonaws.com
Useful sources: